I love "biskits." As a true Son of the South I'm pretty sure it's mandatory. If you search this blog you'll see ample evidence that I am in search of the true hand made Southern Flour biscuit of my youth. I've tried dozens of versions that were Bariatric Friendly - but not "Taste Bud Friendly" Those that were passable close I've included here - but I keep searching for :"The One"
I keep making slight changes and modifications in hopes of getting that crispy, chewy, taste explosion of the perfect biskit. Have I found it... Maybe...
This is the recipe I currently use - and it's close... REALLY close...
ALL ingredient MUST be at room temperature!
Ingredients
1½ Cups Almond Flour
¼ Teaspoons Salt
1 Tablespoon Baking Powder
2 Eggs
⅓ Cups Sour Cream
4 Tablespoons Butter (melted)
⅓ Cups Shredded Cheese (optional)
½ Teaspoons Garlic Powder
Instructions
Preheat your oven to 400°. Spray your pan. A baking spray that uses flour is best.
Also, these biscuits will spread when they cook so use a pan that has walls like a brownie or cupcake pan. Unless you like flat biscuits. I'm not judging.
Combine all of your dry ingredients. Using a fork will help break up some of the clumps in the almond flour.
Combine all of your wet ingredients and start mixing.
Looks like egg drop soup? Keep mixing.
Looks like you put too much butter in your mashed potatoes? Keep mixing.
You can stop mixing when it looks smooth - it takes a while
Pour your wet ingredients into your dry and start mixing. A silicone spoon is great for this.
This doesn't take much effort. The almond flour actually absorbs liquid faster than wheat flour.
Now let's dump the cheese in there! Mix well. Oiled hands work best.
Now start transferring to the pan a spoonful at a time.
It doesn't have to look perfect. Just try to keep the portions even-ish.
Bake for 10 to 12 minutes
Until they look GBD (Golden Brown and Delicious)!
It's going to blow your mind, the first time you try one.
I usually eat at least one straight out of the pan but then I go to work making breakfast sandwiches for the week.
Just assemble, bag and freeze.
Cook's Notes:
Use a shredded Monterrey Jack or Mozzarella for a plain biscuit. Use a strong sharp cheddar and a pinch of cayenne for that "Cheesy Biskit" flavor
Monday, April 15, 2019

Friday, April 12, 2019
Sausage and Egg Cups
The saying goes "He who fails to plan, plans to fail." And that is never more true than when it comes to meal planning for the post-bariatric lifestyle. If you're not taking the time to assure that you are staying on your eating plan, I can ASSURE you that you are not.
Thankfully, meal planning can be super simple - particularly with recipes like this one. Perfect breakfast for a crowd - or "plan-ahead" breakfasts for the week!
INGREDIENTS
2 lb. ground pork (or turkey) sausage
1 tsp. kosher salt
Freshly ground black pepper
2 1/2 c. chopped fresh spinach
1 c. shredded white cheddar
12 eggs
1 tbsp. freshly chopped chives or green onion (for garnish)
DIRECTIONS
- Heat oven to 400 F
- Divide sausage into 12 equal (approximately) balls
- Add a ball of sausage to each well in the muffin tin and press up the sides to create a cup.
- Divide spinach and cheese evenly between cups.
- Crack an egg on top of each cup and season with salt and pepper.
- Bake until eggs are set and sausage is cooked through, about 25 minutes.
- Garnish and serve.
Of course this recipe can be halved or even quartered for the smaller appetite.
I've made them with a pinch of thawed frozen spinach that I drained (squeezed) well and finely chopped
I HIGHLY recommend a silicone muffin tin as they are great for preparing a vast array of single portion oven meals.
I recommend you check the label for your sausage and avoid any with added sugars.
--OR -- you can make your own sausage from scratch
Parmesan Garlic Roasted Cauliflower

It took me 60 years to learn to love cauliflower. I just REALLY didn't like the taste. THEN.. I realized that it wasn't the taste of cauliflower that I hated, it was the LACK of taste that I hated! Once I began to think about cauliflower the same way I think about chicken, a carrier of ADDED flavors, my whole perspective changed. Since then, cauliflower has become a large part of my weekly meal planning. It's the perfect low carb side dish - different textures, different flavors, so it never gets boring.
Ingredients
1 large head cauliflower, trimmed into small florets
½ cup grated Parmesan cheese
1 tablespoon Italian Seasoning
3 cloves garlic, minced
3 tablespoons olive oil, more if needed
sea salt and black pepper, to taste
Instructions
Preheat the oven to 400°F.
In a large mixing bowl, combine the cauliflower, Parmesan cheese, Italian seasoning, garlic, olive oil, salt and pepper. Toss until all ingredients are well combined and the cauliflower is coated.
Line in a single layer, on a rimmed baking sheet and bake on the top rack for 30 to 40 minutes.
Cook's Notes:
Check your local restaurant supply store for "home quality" 1/2 size sheet pans. These are inexpensive and fit perfectly in the average home oven. They have become my primary cooking tool.
Along with them purchase a roll of parchment paper. A sheet on your sheet pans catches nearly all the crumbs and liquids making sure food doesn't stick and cleanup a snap.
Bacon Wrapped Jalapeno Popper Stuffed Chicken
Bacon Wrapped Jalapeno Popper Stuffed Chicken is the dinner that dreams are made of. Creamy and cheesy stuffed jalapenos are stuffed into juicy chicken breasts and then lovingly wrapped in salty bacon. Slow roasted for maximum flavor and basted with homemade BBQ sauce, this is a jalapeno popper like you’ve never had it before.

Start with a classic popper filling, softened cream cheese, medium cheddar cheese, and then add a twist with Sweet BBQ Rub. This adds a little smokiness and sweetness to the inside of the popper itself. Make sure your jalapenos are thoroughly cleaned of seeds and ribs to remove that excess spiciness. I like to split my jalapenos in half and scrape the seeds before stuffing with the filling and then pressing them back together.
Once your poppers are assembled, it’s time to get to the next step! Use a sharp knife to split your chicken breasts. I press down with one hand on top of the breasts and use the other hand with the knife parallel to the cutting board to slowly slice through the breast. Make sure you don’t cut all the way through, leave one side of the breast completely in tact so you can easily open and close the chicken.
Set the stuffed popper in the middle of the opened breast and then fold the top flap of the chicken over to envelop the popper completely. Next up, it’s time to wrap in bacon! I like to use a regular thickness of bacon on this chicken so the fat has time to render and crisp by the time to chicken is done cooking.
When the internal temperature of the jalapeno popper stuffed chicken reaches 150 degrees F, I like to baste with BBQ sauce. If you don’t want to take the time to make homemade sauce, you can always use your favorite store bought brand. Continue cooking until the internal temperature reaches 165 degrees F. I like to use an instant read thermometer.
ADAPTATIONS
I make my jalapeno popper stuffed chicken in my smoker, but if you don’t have one you can absolutely use an oven or a regular gas or charcoal grill. All you have to do is follow the same time and temperature guidelines in the written recipe below. In your oven, make sure the bacon fat has somewhere to go. I recommend cooking on a roasting rack above a baking sheet so the fat can drip down and not saturate the bottom of your chicken.
If you’re cooking these in a regular grill, the key is cooking the chicken on indirect heat. Turn on half of your burners and then cook the chicken on the half where the burners are off. The radiant heat will cook them without having do deal with the flare ups and grease fires from the bacon fat dripping down onto your coals or open flames.

Ingredients
- 4 boneless skinless chicken breasts
- 4 large jalapenos
- 4 oz cream cheese softened
- 4 oz medium cheddar cheese shredded
- 1 Tablespoon No Sugar Added BBQ Rub
- 12 pieces bacon
- 2 Tablespoons No Sugar Added BBQ Rub
- 1/2 cup No Sugar Added BBQ sauce
Instructions
Preheat your oven/grill/smoker to 250 F for indirect heat with mild wood like apple or hickory.
Prepare your poppers by slicing the tops off of the jalapenos, cutting them in half, and scraping out the ribs and seeds inside of the poppers.
In a small bowl, combine the cream cheese, cheddar cheese, and the 1 Tablespoon of sweet rub. Use the back of the spoon to press the filling mixture into each half of the cleaned out peppers and then press the pepper halves back together.
On a large cutting board, slice the chicken breasts open, without slicing all of the way through the breasts. Set one filled popper inside of each chicken breast and fold them closed.
Wrap each chicken breast with about 3 slices of bacon. Secure the bacon ends with toothpicks, if necessary. Season the stuffed chicken on all sides with more of the sweet rub.
Place the chicken breasts on the oven/grill/smoker, close the lid and cook until the internal temperature reaches 150 degrees F. This process usually takes an hour and a half. Baste the chicken liberally with BBQ sauce, close the door, and continue cooking until the internal temperature reaches 161 degrees F.
- Remove the chicken to a cutting board or serving platter and allow it to rest for about 10 minutes before slicing/serving. Enjoy!!
Cook's Notes:Use a spoon to scrape the veins and seeds out of the jalapenos.If you have sensitive hands, I recommend powder free medical examination gloves
- DO NOT TOUCH YOUR EYES if you prep peppers with bare hands
- I prefer thin bacon for the wrapper. The thick stuff takes too long to cook.
Thursday, August 23, 2018
Bariatric Avocado Toast
I've drunk the Kool-Aid and tried the strange Millennial craze called "Avocado Toast". I like toast... and I like avocado, but honestly, I expected it to be AWFUL. What I found was that was not NEARLY the case. This stuff is GOOD!!!
Now... The only problem is THE TOAST.. Hmmm How can I enjoy this without all the carbs in the crisply toasted white bread.....
In walks Chaundra Evans, Nutritional Counselor extraordinaire. In one of our sessions she gave me a packet of Hemp Hearts. I found them crunchy and delicious. THIS is my toast substitute!!!
This recipe, if I can dare call it that, is super simple - and the PERFECT quick (instant?) breakfast
INSTRUCTIONS
Gobble it up with a spoon.
Yeah, it’s that simple.
Cook's Notes:
Now... The only problem is THE TOAST.. Hmmm How can I enjoy this without all the carbs in the crisply toasted white bread.....
In walks Chaundra Evans, Nutritional Counselor extraordinaire. In one of our sessions she gave me a packet of Hemp Hearts. I found them crunchy and delicious. THIS is my toast substitute!!!
This recipe, if I can dare call it that, is super simple - and the PERFECT quick (instant?) breakfast
INSTRUCTIONS
- Slice a perfectly ripe avocado in half.
- Remove the seed
- Top each half with protein-rich hemp seeds, kosher salt, and some lemon juice
Gobble it up with a spoon.
Yeah, it’s that simple.
Cook's Notes:
- If you really want to amp up the flavor, sprinkle on some of Trader Joe’s “Everything But the Bagel” seasoning.
- Be careful slicing open an avocado, as a slipped knife will give you a bad case of "Avocado Hand" (and yes - that's a real thing!)
Monday, July 9, 2018
Protein Pimento Cheese
Pimento cheese is a staple at nearly every event in the South, weddings and funerals and baby showers and bar mitzvah's (if we had any) ALWAYS have a big bowl and lot's of "spread-ons".

Granny used to make all our pimento cheese - then we got all "city-fied" and started buying it in those little plastic containers. Granny's was always better, but those little tubs are SO convenient. Eventually we forgot how good Granny's was... sad...
Well, I hate to tell you, but there are things in that little tub that are detrimental to your bariatric eating plan (I read labels) - so...
Here is a "bariactricided" version of My Granny's Southern Pimento Cheese with added protein.
Now, as Granny would have said, "Git out yer big bowl an' a wood spoon an' foller along."
Ingredients:
3 tablespoons good Mayonnaise (see Cook's Notes)
3 tablespoons Greek yogurt
1/2 teaspoon garlic powder
2 teaspoons (sugar equivalent) artificial sweetener
1/2 teaspoon salt and a few grinds of fresh black pepper
1/2 cup Unflavored Whey Protein Isolate
One 6-ounce jar whole pimentos – well drained and diced
8 ounces (REALLY) Sharp Cheddar
pinch cayenne (optional)
Instructions:
Serving:
Serve small scoops on top of cucumber rounds or eat a small scoop from a dish – makes a delicious office lunch. - or glob some on top of a hot hamburger patty for true pimento cheese heaven - or make the delicious cheese "crackers" shown in this recipe
Cook's Notes:

Granny used to make all our pimento cheese - then we got all "city-fied" and started buying it in those little plastic containers. Granny's was always better, but those little tubs are SO convenient. Eventually we forgot how good Granny's was... sad...
Well, I hate to tell you, but there are things in that little tub that are detrimental to your bariatric eating plan (I read labels) - so...
Here is a "bariactricided" version of My Granny's Southern Pimento Cheese with added protein.
Now, as Granny would have said, "Git out yer big bowl an' a wood spoon an' foller along."
Ingredients:
3 tablespoons good Mayonnaise (see Cook's Notes)
3 tablespoons Greek yogurt
1/2 teaspoon garlic powder
2 teaspoons (sugar equivalent) artificial sweetener
1/2 teaspoon salt and a few grinds of fresh black pepper
1/2 cup Unflavored Whey Protein Isolate
One 6-ounce jar whole pimentos – well drained and diced
8 ounces (REALLY) Sharp Cheddar
pinch cayenne (optional)
Instructions:
- Grate your cheddar with the large holes on a box grater
- Stir the mayonnaise, yogurt, garlic powder, sweetener, salt, pepper, optional cayenne and protein together in a large bowl.
- Stir in the pimentos then fold in the shredded cheddar.
- Mixture will be a bit hard to stir, but will turn creamier once it melds together in the bowl. - also counts as cardio toward the last gym visit you missed
- Cover and chill.
Serving:
Serve small scoops on top of cucumber rounds or eat a small scoop from a dish – makes a delicious office lunch. - or glob some on top of a hot hamburger patty for true pimento cheese heaven - or make the delicious cheese "crackers" shown in this recipe
Cook's Notes:
- Good mayonnaise doesn't have any sugar in it - if you live in the south, that means "Duke's Real Mayonnaise" - If you live anywhere else, make a good friend in the South!
- A TINY pinch of Cayenne really points up the flavor, or a lot can bring on the heat - use at your own discretion.
- Cheddar cheese pro tip: Buy a pound and grate half. That way you don't knock the skin off your knuckles with the grater!
Thursday, June 28, 2018
What's for Dinner?
Those "3 little words" that strike fear into the heart of every one of us every afternoon - and it's even worse when you are a bariatric patient and really WANT to pursue healthy eating for not only yourself, but also your family. This is going to show you the kinds of healthy and SIMPLE dinners that you and your family can all enjoy.
I have some specialty tools in my kitchen that aid me on my particular culinary journey, but I'm going to assume - probably correctly - that you have only knives, pans and a small but adequate spice rack.
Just to be clear, carbohydrates (hereinafter referred to as carbs) are NOT evil - they simply need to be a very limited part of the post-bariatric eating plan. The dinner ideas we present here are low carb, high in protein, simple to make and TASTY.

Jalapeno Shrimp Veggie Bake
It's the peak of summer when I write this and all around me, farm stands have the locally grown vegetables stacked and primped for their perennial "closeups". The local shrimpers are at the peak of their season and "freshness" is a feature that I cannot ignore. AND.... This miracle of flavor and freshness will be on the table in under an hour.
INGREDIENTS
16 medium shrimp (peeled, thawed)
2- 3 chopped garlic cloves
One large tomato (sliced 1/3 inch thick)
2 summer yellow squash (sliced 1/4 inch thick)
One jalapeño, sliced and deseeded. Or keep the seeds and veins for extra spice.
1/4 cup onion (sliced or chopped)
1/3 cup Parmesan crumbles
1/2 cup almond flour
1/4 teaspoon each salt and black pepper
1/2 teaspoon chili pepper flakes or seasoning
1 tablespoon softened or melted butter (see below for other options)
1/3 cup cream
Two eggs
Cilantro and additional chili flakes for toppings and garnish
INSTRUCTIONS
First make sure your shrimp is peeled and thawed completely. You can rinse them in cold running water if needed to get them ready.
Preheat oven to 350 F
Slice all your veggies - I recommend a slicer or mandolin if you have one handy. If not, a sharp knife is your best friend.
Slice all your veggies - I recommend a slicer or mandolin if you have one handy. If not, a sharp knife is your best friend.
Layer them evenly into a greased or oiled 9 X 13 casserole dish
Place Shrimp on top or mixed within the veggie layers.
In small bowl, mix your eggs, garlic, almond flour, butter, cream, and seasoning.
Pour this evenly over your shrimp and veggie dish.
Add your Parmesan on top (evenly).
Bake at 350 Fahrenheit for 45 minutes. Depending on your oven, it could be less. Just want to make sure that your shrimp is cooked and your veggies are nice and tender. so be sure to check at 30 minutes just in case.
The top should be lightly brown and crunchy from the parmesan and the eggs should be cooked through.
Remove from oven and top with cilantro
Feel free to season with additional salt-and-pepper and chili flakes as well.
Cook's Notes:
You can use non dairy butter or olive oil if desired but the taste and consistency might be different. Check at around 35 minutes to see if the veggies cook faster.
I chose 16 shrimp as a good starting point. Of course, you can completely cover the pan if you have a house full of seafood loving carnivores
Zucchini works well in place of yellow squash
Coconut cream works as a substitute for cream
Notes on consistency- the egg/butter/cream mixture acts as a base almost like a frittata. You will want to make sure that's cooked through as well. If you find the consistency too runny, use less cream or one less egg.
To use coconut flour in place of almond flour. It is in a ratio of 1/4 of the almond flour. So, in this recipe you will use 2 tablespoons coconut flour instead of 1/2 cup almond flour. Add a little extra liquid - coconut flour is DRY
Beef Stroganoff Soup
This is "brown food".. Brown food doesn't make for pretty pictures - but for sure - brown food tastes good!!
Ingredients:
2 large sirloin steaks (1.75 lb)
1 lb. brown or white mushrooms
¼ cup ghee (or butter)
2 cloves garlic, minced
5 cups Beef bone broth
2 tsp paprika
1 tbsp Dijon mustard
juice from 1 lemon
1 ½ cup sour cream
¼ cup fresh chopped parsley
1 tsp salt
¼ tsp black pepper
Instructions:
Ingredients:
2 large sirloin steaks (1.75 lb)
1 lb. brown or white mushrooms
¼ cup ghee (or butter)
2 cloves garlic, minced
5 cups Beef bone broth
2 tsp paprika
1 tbsp Dijon mustard
juice from 1 lemon
1 ½ cup sour cream
¼ cup fresh chopped parsley
1 tsp salt
¼ tsp black pepper
Instructions:
- Place steaks in the freezer in a single layer for 30 min.
- Meanwhile, clean and slice mushrooms.
- When the steaks are ready, use a sharp knife and slice them across the grain, as thinly as you can.
- Season with salt and pepper.
- Grease a large pan with half the ghee.
- Place over Medium High burner.
- Once sizzling hot, add the beef slices in a single layer. - DO NOT OVERLOAD - DO NOT CROWD PAN
- Quickly fry until browned from all sides.
- Remove from pan & set aside for later.
- Repeat until all meat is cooked.
- Grease the pan with remaining ghee.
- Saute remaining ingredients except broth & sour cream.
- Cook for 2-3 min.
- Add broth.
- Cook 2 additional minutes.
- Add the browned beef slices and sour cream.
- Stir and serve
German Cucumber Salad
German Cucumber Salad is a refreshing summer salad made with simple ingredients that are a staple in most kitchens! This recipe is easy to make, budget-friendly, and perfect for a potluck, family dinner, or summer cookout.
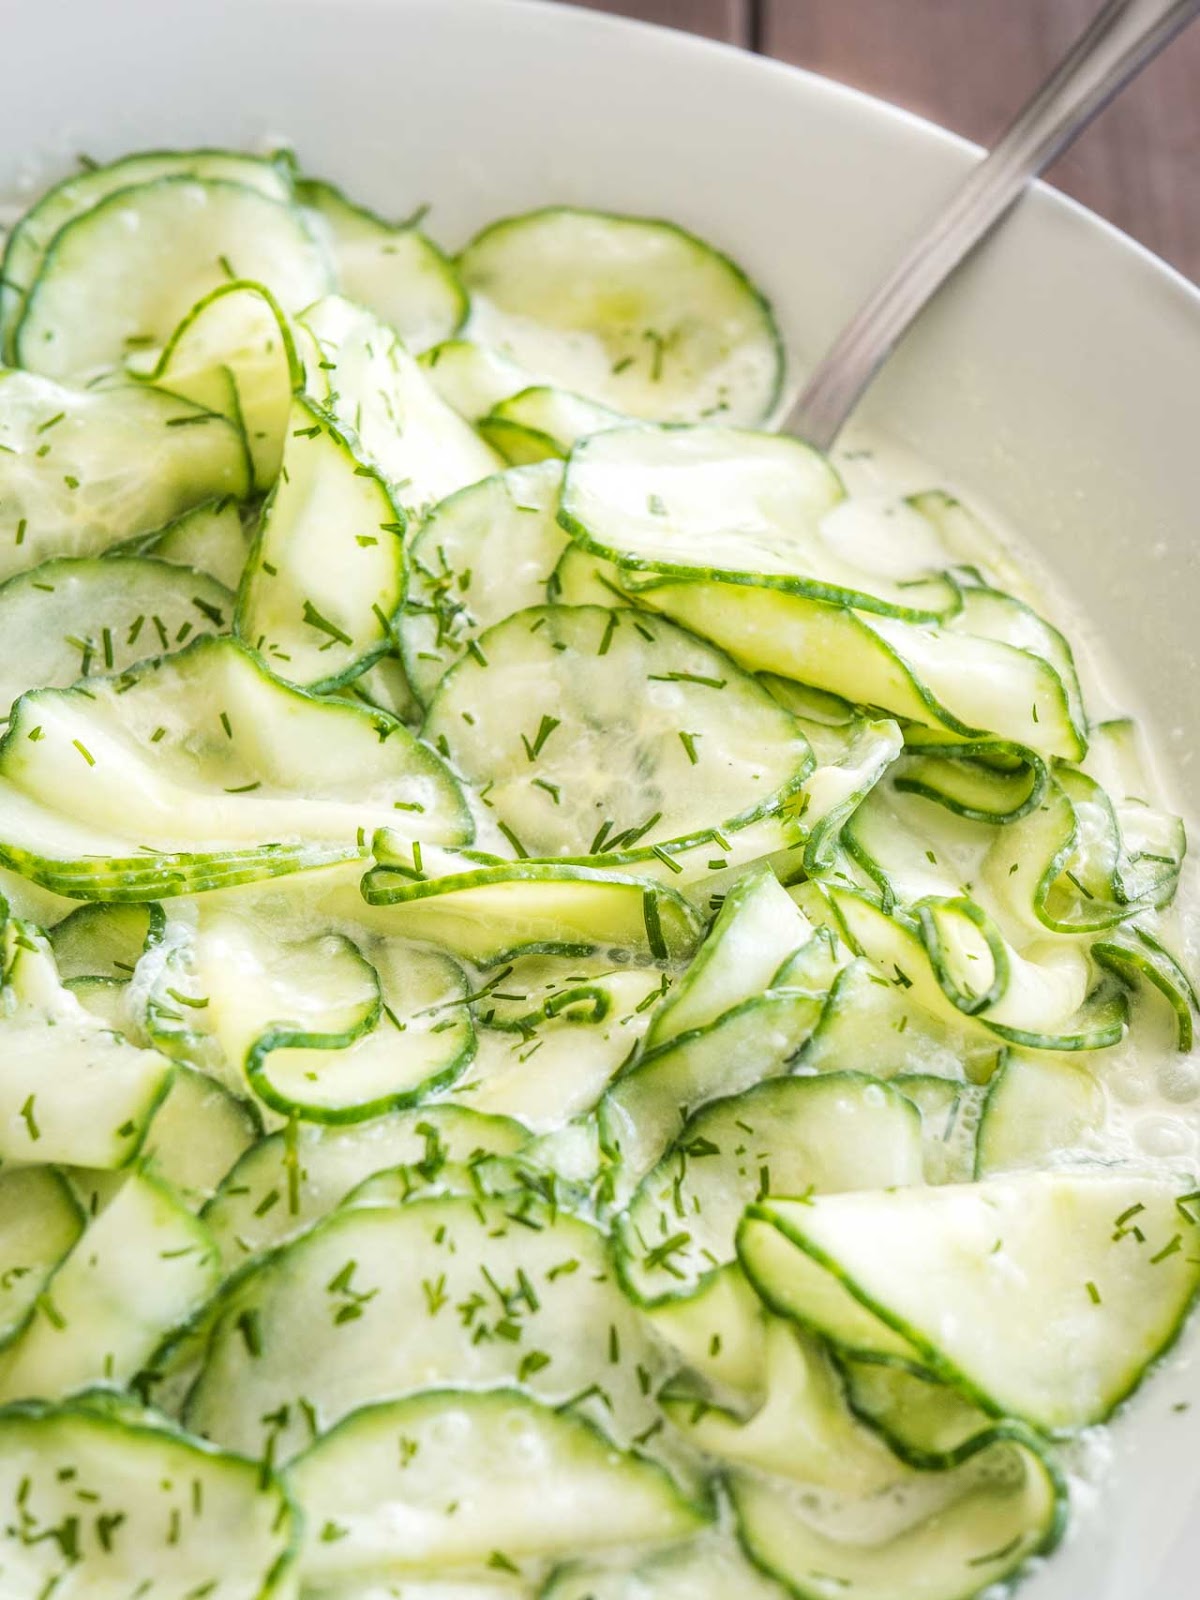
No specialty tools required if you have a REALLY steady hand with a sharp knife, but for consistently thin slices I recommend a mandolin or "Spiralizer"
Ingredients
2 English cucumbers or 4 medium cucumbers
1/2 cup sour cream
1 tbsp white vinegar
1 tsp (equivalent) sweetener
1 tbsp fresh or frozen dill
1 1/2 tsp salt
Ingredients
2 English cucumbers or 4 medium cucumbers
1/2 cup sour cream
1 tbsp white vinegar
1 tsp (equivalent) sweetener
1 tbsp fresh or frozen dill
1 1/2 tsp salt
pepper to taste
Instructions
Instructions
- Peel the cucumbers if desired and thinly slice them, I recommend a a mandoline slicer or "Spiralizer". The thinner the better!
- Put them in a large salad bowl.
- Sprinkle liberally with the salt - this will make them release a lot of their water and keep the salad from being "soupy".
- Allow it to sit for 20 to 30 minutes.
- Rinse cucumbers, drain well and return to large bowl.
- In a medium bowl whisk together the sour cream, vinegar, sweetener, and dill. Add salt and pepper to taste.
- Pour dressing over cucumber slices and toss until combined. Cover and let chill in the fridge for at least 4 hours or overnight.
- Serve with a slotted spoon.
Cooks Notes:
You might consider a tiny pinch of cayenne or a small sprinkle of hot sauce
Protein Root Beer Float
Nothing says "cool" like an ice cream float on a lazy hot summer afternoon. But you and I know better than to pour a bubbly soda over several dollops of sweet creamy vanilla ice cream.. (sigh...)
You know I never leave you with a picture like that in your mind without giving you a bariatric friendly, delicious, and hopefully GOOD for you, substitution!
So.. Break out your blender - we're making a root beer float!

The good folks at Dr. Pepper/7up make a VERY nice collection of Sugar Free flavored drink packets (think Crystal Light) for their entire "Crush" productline, Grape, Orange and Pineapple. They also offer a VERY refreshing Squirt - and - our hero for today, A&W Root Beer. They are available online and in MANY Markets. I first discovered them in WalGreens, then the Dollar Tree and finally I ordered cases from Amazon! Watch the pricing - some sellers on Amazon want to PRONG you
All of them are quite tasty in a bottle of water (I prefer a 20 oz instead of the recommended 16.9 oz) for those times when you are just "watered out" and can't face another bottle or glass.
Ingredients:
1 scoop vanilla protein powder
1 packet A&W Root Beer drink mix
2 cups ice cubes
1/3 cup non-fat powdered milk
1 cup water
Splash heavy whipping cream (optional)
Instructions:
Cook's Notes:
---dave---
You know I never leave you with a picture like that in your mind without giving you a bariatric friendly, delicious, and hopefully GOOD for you, substitution!
So.. Break out your blender - we're making a root beer float!

The good folks at Dr. Pepper/7up make a VERY nice collection of Sugar Free flavored drink packets (think Crystal Light) for their entire "Crush" productline, Grape, Orange and Pineapple. They also offer a VERY refreshing Squirt - and - our hero for today, A&W Root Beer. They are available online and in MANY Markets. I first discovered them in WalGreens, then the Dollar Tree and finally I ordered cases from Amazon! Watch the pricing - some sellers on Amazon want to PRONG you
All of them are quite tasty in a bottle of water (I prefer a 20 oz instead of the recommended 16.9 oz) for those times when you are just "watered out" and can't face another bottle or glass.
Ingredients:
1 scoop vanilla protein powder
1 packet A&W Root Beer drink mix
2 cups ice cubes
1/3 cup non-fat powdered milk
1 cup water
Splash heavy whipping cream (optional)
Instructions:
- Place all the ingredients into the blender or food processor bowl
- Blend at highest speed until ice is completely incorporated
- Pour into tall glass and grab a straw or two (only if straws are allowed!)
Cook's Notes:
- You can substitute the powdered milk and water for 8 oz of your favorite milk or milk substitute. Almond milk is delicious.
- Substitute Orange Crush mix and you get a "Dreamsicle"
- Feel free to experiment!
---dave---
Tuesday, May 8, 2018
Marinated Cauliflower Antipasto Salad

Here I sit, in the afterglow of my first bowl of this antipasto. This stuff is REALLY good. Far better and a LOT cheaper than any I've purchased from the Italian Deli!!
I always thought cauliflower was awful. Nasty texture - no taste.. UNTIL I found out how versatile it is. I've seen pizza crusts and mashed faux-tatoes, fried rice and even ice cream made with it. This may be the place it shines. There's nothing like a good pickled cauliflower.
This one is a MUST for your summer dinners (or snacks!)
I always thought cauliflower was awful. Nasty texture - no taste.. UNTIL I found out how versatile it is. I've seen pizza crusts and mashed faux-tatoes, fried rice and even ice cream made with it. This may be the place it shines. There's nothing like a good pickled cauliflower.
This one is a MUST for your summer dinners (or snacks!)
1 medium head cauliflower, cut into bite sized pieces (4 cups cauliflower pieces)
1 cup marinated mushrooms, sliced
2 oz. salami, cut into short strips
2 oz. Provolone cheese, cut into short strips
6 oz. olives - whatever you like, drained and cut in half
1 jar (12 oz.) roasted red peppers, drained and cut into strips
3 T capers, drained (more or less to taste)
Dressing Ingredients:
1 cup marinated mushrooms, sliced
2 oz. salami, cut into short strips
2 oz. Provolone cheese, cut into short strips
6 oz. olives - whatever you like, drained and cut in half
1 jar (12 oz.) roasted red peppers, drained and cut into strips
3 T capers, drained (more or less to taste)
Dressing Ingredients:
1/4 cup vinaigrette dressing
1 T extra virgin olive oil
2 T fresh-squeezed lemon juice
1 T caper juice (from the jar of capers)
1/2 tsp. dried Greek oregano
Instructions:
1 T extra virgin olive oil
2 T fresh-squeezed lemon juice
1 T caper juice (from the jar of capers)
1/2 tsp. dried Greek oregano
Instructions:
Cut out the core of the cauliflower and discard
Cut the raw cauliflower into bite sized pieces in a covered bowl
Add 4 Tbsp water and microwave for 4 minutes on high (may vary - cook to tender-crisp)
Put in a colander and allow to cool.
Add 4 Tbsp water and microwave for 4 minutes on high (may vary - cook to tender-crisp)
Put in a colander and allow to cool.
While the cauliflower drains, whisk together vinaigrette dressing, olive oil, lemon juice, caper juice, and dried oregano to make the dressing. When cauliflower has drained well, put a double layer of paper towels on the counter, spread cauliflower out on the towels and pat dry with more towels.
Be sure to get the cauliflower as dry as you can get it, or the salad will be watery.
Dump everything into a large Ziploc bag with the dressing and let it all marinate in the fridge, preferably for 4-6 hours or as long as all day. (Minimum marinating time is 2-3 hours if you don't plan far enough ahead.) Add more dressing until the salad is as moist as you prefer. (You may not want all the dressing.)
Put the cauliflower in a large bowl and toss with the salami strips,
Provolone strips, red pepper strips, sliced mushrooms, olives, and capers. Dump everything into a large Ziploc bag with the dressing and let it all marinate in the fridge, preferably for 4-6 hours or as long as all day. (Minimum marinating time is 2-3 hours if you don't plan far enough ahead.) Add more dressing until the salad is as moist as you prefer. (You may not want all the dressing.)
Season to taste with salt and fresh-ground black pepper and serve.
This salad can be made several hours ahead and will also keep in the fridge for a couple weeks. It just gets better!
Cook's Notes:
This salad can be made several hours ahead and will also keep in the fridge for a couple weeks. It just gets better!
Cook's Notes:
- Instant marinated mushrooms by cutting button mushrooms into bite size pieces, drizzle well with vinaigrette and microwave, covered, on high for 3 minutes
- Add on's: Boconcini (little mozzerella balls), Yellow pepper rings, pickled jalapenos, steamed (microwaved) onion petals, <insert imagination here>
DO THIS!!!
Wednesday, April 4, 2018
Garlic Parmesan Bacon Knots
 I am a passionate beef eater. There is a rare food that I will choose over the opportunity to sink my teeth into a brilliant red succulent steak - unless, of course, it's BACON!!!!
These bacon knots will knock the socks off your guests or provide you with the tastiest snack you can imagine. The recipe scales perfectly from making one in your toaster over, to making thousands for the Oscar's after party!
Start now.. In 30 minutes you are going to have a DELICIOUS treat!
Ingredients
12 slices bacon
1/2 tsp. Italian seasoning
1/2 tsp. garlic powder
1/2 tsp. red pepper flakes
1/4 c. freshly grated Parmesan
Directions
- Preheat oven to 425°
- Line a baking sheet with parchment paper.
- Tie each slice of bacon in a double knot and place on sheet tray.
- Season each knot with Italian seasoning, garlic powder and red pepper flakes.
- Bake for 10 to 12 minutes, or until almost crisp.
- Remove from oven and grate Parmesan over knots.
- Return to oven and bake 6 to 7 minutes more, or until desired crispness is achieved.
- Let cool slightly before serving.
Cook's Notes:
- Usually I make some kind of suggestion here about variations on the theme or ways to achieve a different taste. Not this time.. These may well be the PERFECT bariatric snack.
- Store leftovers in the refrigerator. Allow to come to room temperature or heat gently before serving
Tuesday, January 30, 2018
Creamy Lentil Soup
My boss caught me working one day a couple months ago and decided they want me to do it all the time, so that cut into my ability to post on a regular basis. BUT.. This one is so good over our chilly weekend that I am taking a moment to share it with you. Creamy, silken, comforting, rich, delicious....
I love beans - and while lentils aren't REALLY beans, you can treat them the same way. And they are FAST!! 30 minutes for dried lentils and it takes all day to prepare dried beans. And they are SO YUMMY!!!
It's the middle of January as I post this and everyone needs something warm to cuddle around. It'll comfort your pouch AND your soul.
Ingredients
1 Tbsp Oil
1 cup Chopped Onion
2 tsp minced Garlic about 2 cloves
1 tsp Curry Powder
1/2 tsp Ground Ginger
1/4 tsp Chili Powder
1 can (15 oz) Diced Tomatoes with Juice
1 cup Lentils
1 tsp Salt
3 cups Water
1 cup Greek Yogurt
1 tsp Corn Starch
Instructions
Ingredients
1 Tbsp Oil
1 cup Chopped Onion
2 tsp minced Garlic about 2 cloves
1 tsp Curry Powder
1/2 tsp Ground Ginger
1/4 tsp Chili Powder
1 can (15 oz) Diced Tomatoes with Juice
1 cup Lentils
1 tsp Salt
3 cups Water
1 cup Greek Yogurt
1 tsp Corn Starch
Instructions
- Heat oil in a medium soup pot over medium heat.
- Add onion and saute until soft, about 5 minutes.
- Add garlic and saute until fragrant, 1 – 2 minutes.
- Add spices and saute until fragrant, 30 – 60 seconds.
- Add tomatoes with juice, lentils, salt, and water to the pot and bring to a simmer.
- Reduce heat to low and cook at a slow simmer until lentils are soft, about 30 minutes. Stir often.
- Once lentils are soft, remove soup from heat and let cool for 5 minutes.
- While soup is cooling, whisk together yogurt and corn starch in a medium bowl.
- Add about ½ cup of the soup liquid to the yogurt mixture and whisk until smooth. This is called "tempering".
- Gently add the yogurt mixture back into the warm soup, whisking until creamy throughout.
- Serve.
Tuesday, January 9, 2018
My Favorite Board Games
I'm not COMPLETELY absorbed in the creation of food. To prove that I'm sharing a list of my favorite board games.
• Battlechip
• Soups and Ladders
• Settlers of Crouton
• Scramble
• Whisk
• Nomopoly
• Tater Tahtzee
• Pancake Battergories
• Trivial Grapefruit
• Soda Poperation
Tuesday, December 5, 2017
Christmas Cranberry Salsa
Fresh cranberries are minced up with jalapeno into a healthy, fresh, and vibrant salsa.
Ingredients
12 oz fresh cranberries
¼ cup sliced green onions
2 jalapeños, minced
¼ cup fresh cilantro leaves, minced
2 tablespoons finely grated fresh ginger
2 tablespoons lemon juice
½ cup (equivalent) artificial Sweetner
Instructions
Ingredients
12 oz fresh cranberries
¼ cup sliced green onions
2 jalapeños, minced
¼ cup fresh cilantro leaves, minced
2 tablespoons finely grated fresh ginger
2 tablespoons lemon juice
½ cup (equivalent) artificial Sweetner
Instructions
- Rinse, drain, and pick over cranberries, (discarding all that are soft or bruised).
- Place cranberries in a food processor or blender; pulse until finely chopped but not mushy.
- Place crushed cranberries in a bowl
- Mix together with green onions, jalapeños, cilantro leaves, and ginger.
- Pour lemon juice and sweetener over and stir together.
- Cover with plastic wrap and refrigerate and allow flavors to develop.
- It will be a bit tart to begin with, but as it is allowed to sit it will develop even more flavor.
- Can be served as a plain salsa, but is amazing served over cream cheese.
Friday, October 6, 2017
Parmesan Tomato Chips
It's approaching the end of "tomato season" here in the south. And once again I prepare to force myself into "tomato abstinence" until those luscious juicy crimson orbs appear again late next spring.
BUT... before they go I want to give them a last hoo-rah and demonstrate how they can go from sweet/tart salad and sandwich fodder to crispy chewy low carb pizza treats. You'll need a cooling rack and sheet pan. I usually do 2 sheet pans at a time - yes, they are that good! And they can be kept in an airtight container and "freshened" in the toaster oven for another snack

Parmesan Tomato Chips
Ingredients
cooking spray, for cooling rack
15 assorted tomatoes, sliced 1/3" thick
2 tbsp. extra-virgin olive oilkosher salt
Freshly ground black pepper
2 tbsp. Italian seasoning
1/2 c. freshly grated Parmesan
Instructions
15 assorted tomatoes, sliced 1/3" thick
2 tbsp. extra-virgin olive oilkosher salt
Freshly ground black pepper
2 tbsp. Italian seasoning
1/2 c. freshly grated Parmesan
Instructions
- Preheat oven to 275º
- Grease a cooling rack with cooking spray, then place on top of a large baking sheet.
- On a large, paper towel-lined plate or surface, arrange tomatoes, salt lightly and cover with more paper towel.
- Let them sit for a few minutes while the salt loosens the juice, then press out juices.
- Place tomatoes on cooling rack and lightly drizzle with olive oil, then season generously with a little more salt, pepper and Italian seasoning.
- Bake, checking every 30 minutes, until tomatoes are completely dried out and beginning to crisp, about 3 hours.
- Remove from oven and turn on broiler.
- Sprinkle tomatoes with Parmesan, then broil on low shelf until cheese is melted, 1 to 2 minutes.
- Allow to cool, then remove from cooling rack.
- Garnish with additional salt, pepper and Italian seasoning, as needed, and serve.
Thursday, October 5, 2017
Slow Cooker Rotisserie Chicken
I love rotisserie chicken and OFTEN stop by my local grocer and grab one as the base for whatever I'm thinking about for dinner - and SOMETIMES it's just good to rip off a hunk and stand eating it over the sink (Shh! Don't tell!)
This recipe lets you get that "fresh from the roaster" taste with your slow-cooker, which is my most indispensable kitchen device.
Ingredients
nonstick cooking spray
2 tbsp garlic powder
1 tbsp chili powder
1 tbsp smoked paprika
1 tsp chopped thyme leaves
kosher salt
Freshly ground black pepper
1 whole chicken, neck and giblets removed
Instructions
Ingredients
nonstick cooking spray
2 tbsp garlic powder
1 tbsp chili powder
1 tbsp smoked paprika
1 tsp chopped thyme leaves
kosher salt
Freshly ground black pepper
1 whole chicken, neck and giblets removed
Instructions
- Grease a large slow-cooker with cooking spray. Roll a few small balls of aluminum foil and place on the bottom of the bowl, creating a rack for the chicken.
- In a small bowl, whisk together garlic powder, chili powder, paprika, and thyme. Pat chicken dry with paper towels then season generously with salt and pepper. Rub the garlic mixture all over chicken, then place in the slow cooker, breast side up.
- Cook on high for 2 ½ to 3 ½ hours, until the juices between the leg and the thigh run clear or a thermometer inserted into the thigh reads 165°F. Remove chicken from slow cooker.
- Let rest for 10 minutes before slicing and serving.
Cook's Notes:
- Slow cooker cooking bags are a GREAT way to avoid a lot of cleanup. I recommend them wholeheartedly.
- To crisp up the skin, transfer chicken to a large baking sheet under a hot broiler until golden and crispy, only 3 to 4 minutes.
Spinach and Artichoke Stuffed Peppers
I've been stuffing peppers for as long as I can remember, They make the perfect vessel for delivering anything that "unaltered" folks might put on a bun like these Italian Street Fair peppers - but they also make a great vehicle for America's favorite party dip!
Ingredients
2 cups shredded rotisserie chicken
1 (14-oz.) can artichoke hearts, drained and chopped
1 (10-oz.) package frozen spinach, thawed, well-drained, and chopped
6 oz. cream cheese, softened
1 1/2 cup shredded mozzarella, divided
1/2 cup grated Parmesan
1/4 cup sour cream
1/4 cup GOOD mayonnaise*
2 cloves garlic, minced
4 assorted bell peppers, halved* and seeded
Extra-virgin olive oil, for drizzling
kosher salt
Freshly ground black pepper
Chopped fresh parsley, for garnish
Directions
Extra-virgin olive oil, for drizzling
kosher salt
Freshly ground black pepper
Chopped fresh parsley, for garnish
Directions
- Preheat oven to 400°.
- On a large, rimmed baking sheet, place bell peppers cut side-up and drizzle with olive oil, then season with salt and pepper.
- In a large bowl, add chicken, artichoke hearts, spinach, cream cheese, ½ cup mozzarella, Parmesan, sour cream, mayo, and garlic. Season with more salt and pepper and mix until well combined.
- Divide chicken mixture between pepper halves, top with remaining mozzarella, and bake until cheese is melted and gooey and peppers are tender, about 25 minutes.
- Optionally, garnish with parsley and serve.
Cook's Notes:
- Cut your bell peppers from top to bottom, through the stem. This makes the peppers more like a bowl than a "pot" with a funky stem "lid" the way my Granny prepared them.
- Most cheap mayonnaise has a sugar component, but GOOD mayonnaise (i recommend Duke's in the south) is made without sugar.
Subscribe to:
Posts (Atom)